The default pane layout consists of:
- Scanning Explorer Pane docked in the upper left corner.
- Configure how a scanning session will perform.
- Review images after they are scanned.
- Separated into two distinct areas: the Configuration area and the Revision area.
- Thumbnails Pane docked in the bottom left corner. Right-clicking inside the Thumbnails Pane enables you to:
- Delete a page.
- Use the Split Document or Create Document features.
- Rescan a page.
- Rotate a page.
- Zoom in or out.
- Switch modes (Image Mode vs. List Mode).
- Document Properties Pane docked along the right side.
- Default properties for all scanned documents.
- Which images enhancements and/or processes a scanning session will utilize.
- A specific document's metadata and volume setting.
- The state of this pane changes depending on the item selected in the Scanning Explorer Pane.
- Display Pane. Use this pane to view sample images and scanned images.
- Sample images enable you to test image enhancements before scanning. The results of a test are displayed in the Display Pane. For more information, see Adding a Custom Sample Image.
- Scanned images will appear in the Scanning Explorer Pane, under Revision. Images will be organized into documents. Documents will be grouped by their destination (as defined in Default Properties). Select a document to review its pages in the Display Pane. Use the Display Pane's toolbars to navigate through and process documents.
The Display Pane can be viewed in one of six modes. To change the display mode, select the
 Image button below the image. Then click a display mode.
Mode Description Image (default) Displays scanned images and no text. Text Displays OCRed text and no images. This mode will only appear if the scanning session includes OmniPage OCR. Image before text Splits the Display Pane. The left section displays an image. The right section displays text. Image after text Splits the Display Pane. The left section displays text. The right displays an image. Image above text Splits the Display Pane. The top section displays an image. The bottom displays text. Image below text Splits the Display Pane. The top section displays text. The bottom displays an image. Tip: For modes that split the Display Pane, you can resize each section.
- A hidden Output Log Pane and Error Log Pane.
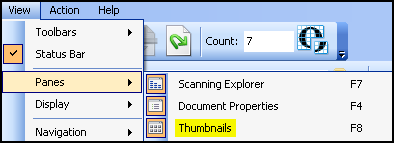
To open/close a pane
- Select View from the menu bar.
- Point to Panes.
- Select
 the pane you want to open or close.
With the exception of the Display Pane, all panes can be auto-hidden using the  pin button. An automatically hidden pane is hidden inside the edge to which it is currently docked. The name of an auto-hidden pane will remain visible along the same edge. Mouse over the pane's name to make it reappear. The pane will disappear when it is not in use.
To access additional pane layout options
- Right-click the name of a pane.
- Select one of the following to change the pane's state.
- Floating: Undocks the pane. Floating panes can be moved to any location and resized.
- Dockable: Enables the pane to be docked. Dockable panes can be docked to any of the Laserfiche Scanning window edges and resized.
- Auto-Hide: Toggles auto-hiding off and on for a pane.
- Hide: Closes the pane.
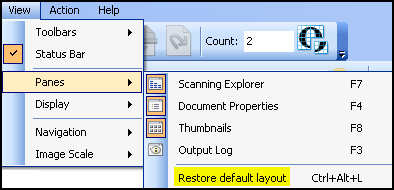
To restore the default layout
Note: Reverting to the default layout does not affect customized toolbars.
- Select View from the menu bar.
- Point to Panes.
- Select Restore default layout.

